The Image button allows inserting raster images into drawings.
Quick Access Panel: ![]()
Ribbon: Editor -> Draw -> Image
Menu: Draw -> Image
The command calls the dialog box Image:
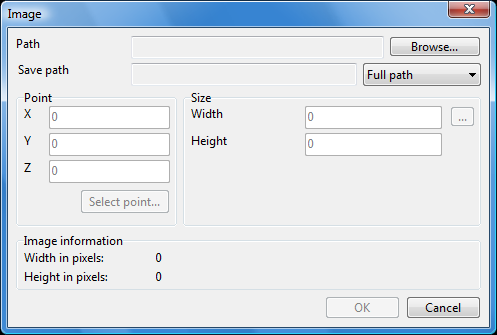
The browse button will allows you to select the necessary file.
•The path to the selected file appears below:
You can select the type of the path to be saved from the drop-down menu on the right of the Save path part. When moving the file to another PC or folder, the search for the external link will be fulfilled according to the saved path.
•Full path specifies the path to the file from the root directory. It consists from the directory letter with a colon and a double slash after it, then all the subfolders separated by a slash are enumerated with the name of the file is at the end.
•Relative path is the path relative to the current directory of the active file. It can't be set if the drawing wasn't saved. If the file to insert is in the same directory as the active one the relative path to it will contain the folder name, the name of the file to insert and the extension. If the file to insert is one level lower, the relative path will consist from the folder name, the file name and the extension.
•No path means that only the file name and extension will be saved. For a correct opening of the end file it is required that the merged files are stored in the same folder.
Note: It is impossible to modify the external link name and path. If the file isn't found with the saved search path, it will be searched for in the folder containing the drawing.
The Section Point allows setting the insert point for the raster image in the following ways:
ofilling in the respective coordinate fields (X;Y;Z);
ousing Select point button:
▪press Select point button;
▪Image dialog box disappears, and the drawing field opens. Select the point using the left mouse button; coordinate fields (X;Y;Z) get filled with the corresponding coordinates:
The Section Size gets by default image size data contained in the file:
To change the size follow the instructions:
opress ![]() button on the right of the respective parameter;
button on the right of the respective parameter;
othe Image dialog disappears; in the drawing filed select the first point by pressing the left mouse button;
odrag the cursor to the required distance, and click on the end-point.
The second parameter is attributed the proportionate value calculated on the basis of the original file proportions.
Image information section shows the size data for the file.
Go to ABViewer